In a Basic workflow, all purchase invoices are sent to the same checker and approver.
Setting up Routes
In everyday practice
An administrative employee (role: Post) processes the purchase invoices in the Validation screen. After the invoices are posted, they are sent to the manager (role: Check). The manager checks the invoices and performs the action Agree. Now, the invoices are sent to the managing-director (role: Approve payment).
The managing-director performs the action Approve for payment. Subsequently, the invoices become payable in the accounting system.
Once the invoices are paid, they will automatically be moved to the archive in the Blue10 service.
In the Blue10 service
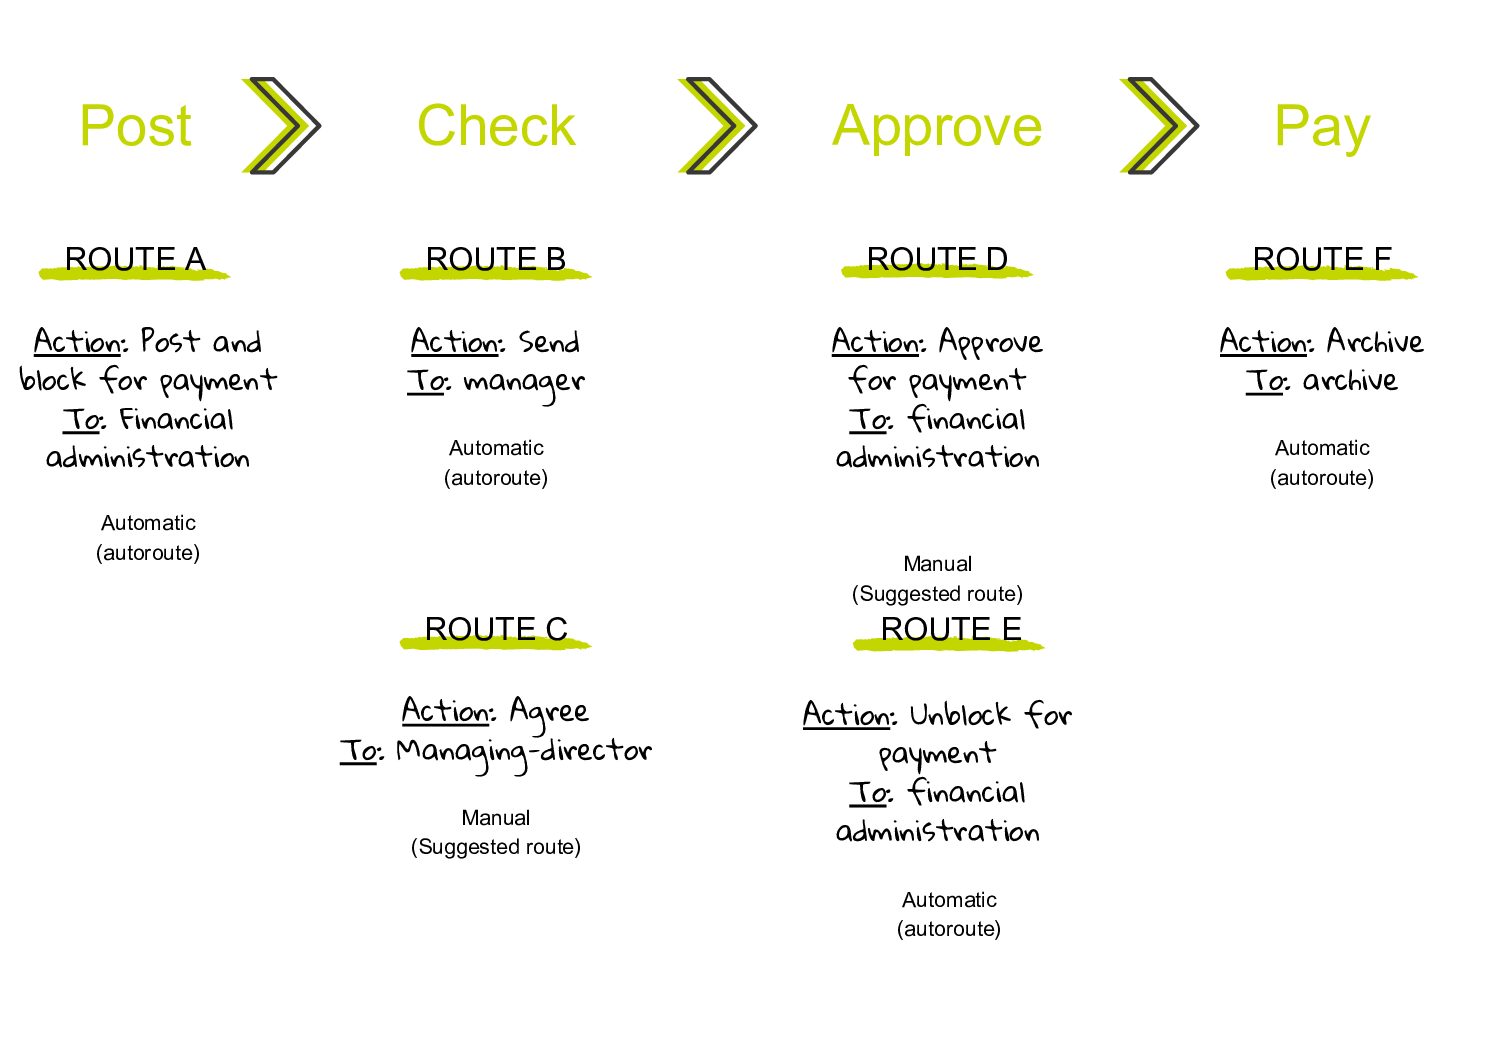
The purchase invoices are processed in the Validation screen. After an invoice is saved in the Validation screen, an autoroute is activated which Posts the invoice and blocks it for payment (route A). The invoice will receive an Entry number.
An autoroute will send the purchase invoice to the manager (route B) after it has been posted. The purchase invoice is now available at the step Approve. The manager checks if all information on the invoice is correct and performs a suggested route. This suggested route includes the action Agree and sends the purchase invoice to the managing-director (route C).
The managing-director can perform the action Approve for payment (route D). The purchase invoice will now be de-blocked for payment (route E) and become payable in the accounting system. Simultaneously, it becomes available on the Payable list in the Blue10 service. As soon as the Payment date is received from the accounting system, an autoroute will perform the action Send to the Archive (route F).
You can find these routes and where they are situated in the Blue10 service in the diagram below.
Note: if you don’t have any user with the role Check, but only one with the role Approve, you can change the name Manager to Managing-Director in Route B. Route C will not be required in your set-up.

How to set-up in the Blue10 service
Here you can find how the process described above can be set-up using routes in the Blue10 service.
Note: When you’re creating a new route, the Company is set to All by default. If you wish to set-up routes for only one of your companies instead of all of them, please select the desired company here.
Overview autoroutes
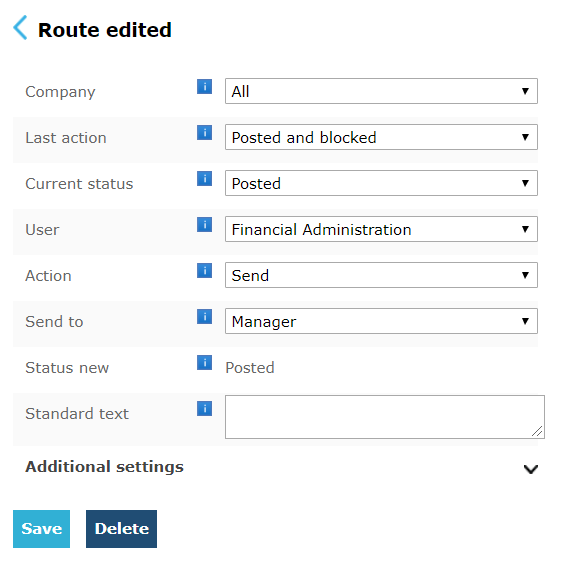
Route A is included in our default set-up. Go to Settings > Autoroutes and create the following route (route B):

The autoroute overview will look as follows:

Overview suggested routes
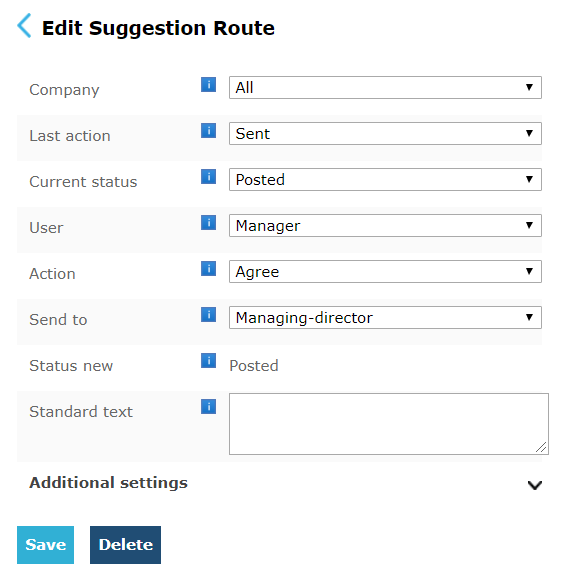
Go to Settings > Suggested routes and create the following route (route C):

The suggested route overview will look as follows:

Note: Users with the role Approve Payment will see the action Approve for payment by default. You are not required to make a suggested route for this.
Route E and F are included in our default set-up. You are not required to create these routes manually.

